

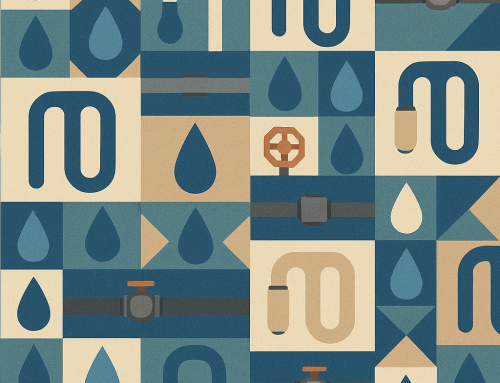
Winter in New Jersey, especially along the shore, brings its share of plumbing challenges. One of the most common issues homeowners face is frozen outdoor spigots, which can lead to burst pipes and costly water damage. The best way to prevent these problems is to install a frost-free hose bib, protecting your home’s plumbing and ensuring easy access to outdoor water year-round. At Breakwater Plumbing, our friendly, fully qualified, and insured team is committed to helping you get the job done right the first time. Here’s your comprehensive guide to install a frost-free hose bib, with expert tips and five crucial steps for flawless, winter-ready plumbing.

Why Choose a Frost-Free Hose Bib?
A traditional hose bib (outdoor faucet) is vulnerable to freezing because water remains in the pipe section that passes through the outside wall. When freezing temperatures hit, this water can expand and burst the pipe inside your wall. A frost-free hose bib, however, features a long stem that positions the valve further inside your home where it’s warmer. This design allows water to drain away from the exposed section, drastically reducing the risk of frozen or burst pipes.
Benefits include:
- Worry-free use of your outdoor faucet in freezing weather
- Reduced risk of water damage and expensive repairs
- Long-term peace of mind for homeowners
1. Choose the Right Location and Hose Bib Length
Why it matters:
The effectiveness of a frost-free hose bib depends on proper placement and stem length. The valve must be positioned inside the home’s heated envelope, not in an uninsulated wall.
How to do it:
- Select a location near your existing outdoor faucet or where you most need water access.
- Measure the wall thickness to determine the correct hose bib length. Frost-free bibs are available in several lengths (typically 8–24 inches).
- Ensure there are no obstructions (wires, studs, pipes) in the wall cavity.
Pro tip:
If you’re unsure about wall thickness or need a custom solution, Breakwater Plumbing can recommend and source the perfect frost-free hose bib for your home.
2. Shut Off and Drain the Water Supply
Why it matters:
Prevent water spills, leaks, and accidental flooding by turning off the water before beginning the project.
How to do it:
- Locate the shutoff valve for the water line serving your outdoor faucet (usually in the basement or crawl space).
- Turn the valve clockwise to close it.
- Open the existing outdoor faucet to drain residual water from the line.
Pro tip:
If there’s no dedicated shutoff for your outdoor faucet, consider having Breakwater Plumbing install one during your hose bib upgrade. It’s a lifesaver for winterization!
3. Remove Old Faucet and Prepare the Opening
Why it matters:
A clean, properly sized opening ensures a tight fit and leak-free installation.
How to do it:
- Unscrew the old hose bib from the wall and plumbing (use channel-lock pliers or a pipe wrench if necessary).
- Carefully remove any old caulking or sealant.
- Enlarge or clean up the hole as needed to accommodate the longer frost-free hose bib.
Pro tip:
Inspect the siding, brick, or stucco for damage around the old faucet. Repair or patch as necessary to create a secure, weather-tight seal.
4. Install a Frost-Free Hose Bib
Why it matters:
The correct orientation and secure connections are vital for freeze protection and long-term performance.
How to do it:
- Insert the frost-free hose bib through the wall from the outside, ensuring the valve seats well inside the heated space.
- From indoors, connect the hose bib to the supply line using an appropriate fitting (soldered copper, PEX, or threaded connection).
- Secure the hose bib flange to the exterior wall with screws.
- Apply a bead of exterior-grade caulk around the flange for a weatherproof seal.
Pro tip:
The hose bib should have a slight downward pitch towards the outside, allowing residual water to drain out after each use.
5. Test for Leaks and Winterize
Why it matters:
Testing ensures a watertight installation and confirms that the frost-free mechanism is working.
How to do it:
- Turn the water supply back on and check all connections for leaks.
- Open and close the hose bib to make sure it operates smoothly and drains when shut off.
- Attach a hose and check for good water pressure and proper drainage.
- Remove and store the hose before winter to keep the bib frost-free.
Pro tip:
If you notice any drips or slow drainage, recheck the installation and tighten connections as needed. Breakwater Plumbing can perform a thorough inspection if you have concerns.
Common Mistakes to Avoid
- Using the wrong length hose bib for your wall thickness
- Failing to pitch the bib downward for drainage
- Neglecting to caulk and weatherproof the exterior flange
- Forgetting to remove hoses during freezing weather
- Not installing an interior shutoff valve for added protection
The Breakwater Plumbing Guarantee
At Breakwater Plumbing, we treat every customer like family. Our friendly, professional plumbers will take the time to answer your questions and explain every step. We never pressure you into unnecessary upgrades, and all our work is fully insured and guaranteed. Whether you’re upgrading one spigot or winterizing your entire home, you can count on us to get it right the first time.
Extra Tips for Winter Plumbing Protection
- Insulate exposed pipes in unheated areas
- Install frost-proof sillcocks on all exterior faucets
- Schedule annual plumbing inspections before winter
- Drain and store garden hoses after each use
- Consider a smart water shutoff valve for added security
When to Call a Pro
- You’re unsure about pipe connections or wall thickness
- There’s visible damage, corrosion, or leaks around your old faucet
- You need to install new shutoff valves or reroute plumbing
- You want a 100% guaranteed, code-compliant installation
Breakwater Plumbing’s experienced Jersey Shore team is ready to help with every aspect of your winter plumbing preparation.
Don’t let winter catch you off guard! Contact Breakwater Plumbing today to schedule your frost-free hose bib installation and enjoy peace of mind all season long.
You might find interesting
- Traditional Bathtubs vs. Walk-In Tubs: Pros, Cons, and How to Choose the Best Option for Your Home
- Winterize Your Home: Shield Your New Jersey Home from Cold Weather Disasters
- 4 Signs You Need to Replace Your Outdoor Spigot Before Winter Hits
- Replace Outdoor Water Spigot For Beginners
- Easily Repair a Leaky Spigot or Hose Bib | DIY Plumbing Repair

")

